Friday, September 30, 2016

Explaindio Video Creator 3.0 Review

Explaindio Video Creator (EVC 3.0 PRO) the latest version will be released on October 4, 2016. It’s been in beta for the good part of 2016 and I’ve been fortunate to be an active beta-tester.

The new 3.0 version of this versatile video creator comes packed with a load of new features that I will highlight in this review. A ton of text and object animation options have been added to Explaindio giving you the flexibility to create professional-looking videos for your clients or your own business.

There are many video creators in the market, but Explaindio not only comes with a load of animation features, it also comes at an affordable price. Similar software in the market can be quite pricey, so it’s great to see a powerful video creation software that you can afford. Talking about the price, I thought it would be a good place to start off this review. So let’s dive right in:

How much will Explaindio 3.0 cost?


Currently, Explaindio 2.0 PRO costs $57 per year. When you maintain an active subscription of EVC 2.0, you will get Explaindio 3.0 FREE. However, at launch the price of EVC 3.0 (commercial version) will be going up to $67 per year (for the first week of launch) and thereafter, the price will be set at $77 per year. Therefore, if you get EVC 2.0 before launch, you can get it at the lower price of $57 per year.

Also, right off the bat, I’d like to inform you that there will be OTOs (One-Time Offers) on the Explaindio sales page during the buying process. The OTOs will include: (1) Monthly Template Club; (2) 3D FBX to ZF3D Converter; (3) 200+ 3D Intros/Outros; (4) 700 Transitions. The OTOs are all relevant offers, but you don’t have to buy the OTOs, unless you find them useful for your business.


If you’ve not yet purchased Explaindio, you can try it risk-free and take it on a 30-Day Test Drive. If you like it and find it useful, you can maintain your membership and will be charged $57 per year. If not, you can avail of the 30-day money-back guarantee. Also, like I mentioned earlier, you will get it at a lower price before launch. If you’re not satisfied, you can freely cancel your subscription before your trial period ends and request a refund.


What is the difference between EVC 2.0 and EVC 3.0?


Before I get into the comparison part of the two versions, if you watched my earlier Explaindio 2.0 Review and have personally used this video creator, you already know that it came with a lot of new features when compared to EVC 1.x. It was a whole new architecture with new features like Animation Points, Sketch-to-Video, Dynamic Zoom and Rotation of Elements, Solid Line Text Sketching and more.

Well, when you enter into the new world of Explaindio 3.0, you will be amazed by the new user-interface, functionality, and loads of new features. First of all, it has a whole new timeline that allows you to create simultaneous animations. It also allows you flexibility to control timing, speed and duration of the animation directly in the timeline. Like I mentioned earlier, EVC 3.0 comes with features galore, I'll list down below, some of the Key Features and then discuss them in more detail, in the following section:

  • Morph Animation
  • Preset Text Animations
  • Preset Object Animations
  • Simultaneous Animations
  • Animated Sketch Hands
  • 3D Animation Functionality
  • API Integration (Youzign & Pixabay)

The new Explaindio Video Creator also includes: UNDO and REDO buttons; and ability to Left and Right align text (in the text box). Imported and embedded MP4 videos no longer need to be converted to 24 fps. This will save a great deal of time and frustration because in EVC 2.0, you have to make sure that the MP4 videos imported in Explaindio had to be converted to 24 fps. Also, there was an improvement in the Image Sketch functionality, that is, the color fill image sketch.

Another improvement is that in EVC 3.0, we will transition from login to license keys. This will be more convenient to users avoiding the issue of the system detecting Explaindio on more than two computers.

The Green Screen feature which was available in EVC 2.0 PRO has been retired because it wasn’t feasible to keep it on due to technical reasons. But, there are free green screen software out there, for example, like Shotcut.

What are the new features in Explaindio 3.0?


One of the first things you will notice is that EVC 3.0 has a New Timeline. It is quite different when compared to EVC 2.0 because it makes SIMULTANEOUS ANIMATIONS possible in Explaindio.

This was one major feature that EVC 2.0 lacked, so it will open up a whole new world in terms of animation possibilities. While we are on the topic of animations, EVC 3.0 comes with Text and Object animations.

The preset TEXT ANIMATION option will allow you to animate text and create cool text animation effects. I really like this feature and I’ve tried various variations of text animations. One example of using text animation is creating animated quotes. With the preset OBJECT ANIMATION option, you can animate any object on the canvas like images, graphics, icons, videos, etc.  Combined, there are over 100 text and object animations included in EVC 3.0. Using these new text and object animations, you can take your video creation to a whole new level.

The new MORPH ANIMATION feature will allow you to morph any text or other objects on the canvas. For example, you can have text morph into an object and vice versa. Using this animation in your video creation can really help enhance and set your videos uniquely apart.

Explaindio already comes with SKETCH-BY-HAND functionality. This allows you to create engaging whiteboard animation videos that have become popular today. In EVC 3.0, this hand sketch functionality has been improved, making the hand movement more natural, rather than static. This makes the hand sketching look more realistic.

New functionality for ANIMATED 3D CHARACTERS and objects has also been included in the all new Explaindio.

3D characters in videos has been catching on and becoming more popular in mainstream marketing. With this new feature, you can also start leveraging by adding 3D animated characters and elements in your videos.

You will not be able to create 3D characters and objects in Explaindio, rather you will be able to import them into EVC and incorporate them into you videos. However, bear in mind that you can only import 3D characters and object in ZF3D format.

Finally, Explaindio 3.0 comes with API integration for Pixaby and Youzign. This will give you free access to hundreds of copyright-free and royalty-free images to use in your videos via Pixabay. Also, if you have Youzign Graphic Design Software, you can now access all your designs from within Explaindio via the Youzign API integration.

It's been said “If a picture is worth a thousand words then a video is priceless.” Hope this gives you a glimpse into the video animation possibilities in the all new Explaindio 3.0.

Is it worth upgrading to EVC 3.0 PRO?


If you are still using EVC 2.0 STANDARD and want to take video creation to the next level, then I would highly recommend that you upgrade to EVC 3.0. If you already have EVC 2.0 PRO, then you will get EVC 3.0 FREE, as long as you maintain an active subscription.

As mentioned earlier, EVC 3.0 comes loaded with new functionality and features. That being said, you should expect a steeper learning curve when using the new Explaindio 3.0 Video Creator. The good news is that you will find many tutorials in the member’s area. Also, I’ve also created several EVC 3.0 Tutorials on my YouTube channel and will be adding more.

You can check my YouTube channel for my Explaindio Review & Video Tutorials.


There is no way that I can cover everything about Explaindio Video Creator in this review, but hopefully it allows you to make an informed decision whether to invest in Explaindio 3.0 or not. Video marketing has become a dominant force in today’s marketing world, so if you are not using video in your promoting your business, you are losing out a great deal. If you have any specific questions regarding EVC 3.0, please feel free to ask and I will do my best to respond to them.


CREDITS
Explaindio Video Creator logo and screenshots are copyright protected, used with permission | Commercial Rights to use videos & images used in this video production | Commercial rights to use other videos and animations

AFFILATE DISCLAIMER
If you use the link above to purchase the product. I may earn a commission as a JVZoo affiliate. This recommendation and review is based on my firsthand experience using this product myself.

Wednesday, September 28, 2016

How to Install Cookie Notification Bar in Blogger

European laws have mandated that online publishers provide their EU visitors information regarding their use of cookies on their blogs, websites or apps. Additionally, you may need to obtain consent from your European visitors.

If you are using a Blogger blog, like this one I'm using here, Google has already added a notice on your blog to help meet these requirements. However, if you’ve made changes to your blog template, the notification may not be working properly.

Using your blog URL, you can check to confirm if this cookie notification is working properly on your blog. In order to do so, replace the “.COM” in your blog URL with “.CO.UK” or “.FR” and test it in your internet browser. If you don’t see a cookie notification, it means that the notification is no longer working. There are various free and paid tools online that can help you install a Cookie Notification Bar like the one you see below.


I used a free online tool called Cookie Consent from SilkTide to install the Cookie Notification Bar which you can use on your blog or website. Watch the video tutorial below on “How to Install a Cookie Notification Bar in Blogger” Though, this tutorial is specific to Blogger blogs, you can use the same method to install the Cookie Notification Bar on other blogs or websites.


In order to better understand what you need to do as an on publisher, you can visit this website www.CookieChoice.org where you will find relevant information regarding the European Cookie Law. Depending on the type of information you collect from visitors on your blog, website or app, you may have to develop a customized Privacy or Cookie Policy.

Sunday, September 18, 2016

How to Manage Spam in Gmail

Google’s Gmail web-based email service, which is free to use, is one of most widely used and popular email services today. Apart from providing 15 GB of free storage space, it has a robust built-in spam-filtering system.

It is a community-based spam filtering system in which emails marked as spam, help other Gmail users, in terms of protecting them from future spam messages from the same email address.

When you first start using Gmail, it may take a little while until Gmail becomes more intuitive in terms of filtering spam messages.

Therefore, it’s important to take the time to mark messages as spam, create filters, identify email that was mistakenly marked as spam, and so on. In the video tutorial below, you will learn How to Manage Spam in Gmail, as well as how to use the smart spam filters.

All email messages that are marked as SPAM are stored in a “Spam” folder. It’s a good idea to check this “Spam” folder regularly because sometimes email messages that are not spam may end up in the folder. You can then use the option to mark it as “not spam”. Gmail automatically deletes the email messages in the “Spam” folder after 30 days.


In the above video tutorial you will learn:

  • How to block a sender?
  • How to report spam email?
  • How to create spam filters?
  • How to mark email as spam?
  • How to mark an email “not spam”?
  • How to edit filters and blocked senders list?

The Gmail spam filters are also a very effective way to deal with spam. For example, you can create a Gmail spam filter to delete email messages from a specific email address as soon as it makes its way to your inbox. Similarly, you can also use the Spam filters to mark certain email addresses as “not spam”. In essence, you are marking those email addresses as “safe senders”.

One of the other good security features of Gmail is that it automatically scans attachments in all incoming and outgoing email messages for viruses. Also, as a security measure, Gmail doesn’t permit emailing executable (“.exe”) files as attachments.

If you don’t have a Gmail email address, you can get one free here: https://accounts.google.com/

If you have any questions or comments, please feel free to leave them in the comments section below. Also, if you have any of your own tips on how to combat spam, feel free to share them.


CREDITS:
Google and the Google logo are registered trademarks of Google Inc., used with permission | Spam images from Public Domain via Pixabay | Microsoft, Windows, and the Windows logo are trademarks, or registered trademarks of Microsoft Corporation in the United States and/or other countries | Other names may be trademarks of their respective owners.

Thursday, September 1, 2016

Say “Hello” or “Goodbye” to the New Google+


In November 2015, Google announced that changes were coming to the Google+ social network. They made a new Web version available for users with an option to switch back to the Classic version

Well, starting in September (I believe September 12, 2016), the Classic version will be put to rest and all users will be forced to the new Web Google+.

Since the new Web version came out, I’ve tried it, on and off several times. However, I mostly stuck with the Classic version for many reasons. 

For one, I prefer the smaller sized, two-column layout. Also, I found that when sharing posts, it was easier, on the Classic version, to add them to Collections. Most of my posts that include an embedded YouTube video, somehow have the thumbnail all skewed up. 

Google Hangouts will also be gone, being replaced with YouTube Live, but not via the Google+ platform. And finally, the new Web Google+ no longer has Events. It has been removed and we most probably won’t see it back. This has left  many Google+ users frustrated and I can understand why.

Well, it’s not all bad, if you can handle what’s left of new Google+ social network. You will now be able to post Photo Comments as well as include a link when responding to comments. There is a new Notifications Center which will be a full-screen notifications page which I believe will be further enhanced. 

If you have a wider screen, you will be able to display a 3-column layout. If not, you will see a 2-column layout which can be customized to a one-column layout, if you wish. Also, Communities will have improved capabilities, giving moderators more control to deal with spam and the like. 

You can check this Google+ Post from Luke Wroblewski for a full list of the New Web Features. Below is a video that highlights some of these key changes and gives you a look at the Classic version compared to the new Web version of Google+:


Back in May 2015, Google launched Google Photos and in August 2015, photos from Google+ were migrated to Google Photos. Earlier, in July 2015 they announced that Google+ would be decoupling from YouTube. From the outside looking in, it seems like slowly, but surely Google has been tearing Google+ apart. 

Google is known to abandon apps as it has done in the past. I spare you the details, but I’m hoping that Google+ sticks around. I know Google’s social network hasn’t really gone mainstream (so to speak) compared to Facebook. 

However, I do like using Google+ and was actually disappointed when they decoupled from YouTube. I found that interface between Google+ and YouTube very practical and useful, especially with regards to managing social interactions via comments on my Tutorials YouTube Channel.

We can expect to see more changes in the coming months as feedback continues to pour in. Make sure to use the Feedback form, on your Google+ profile, to make your voice heard and hopefully Google will give heed to our feedback. 

It’s difficult to please everyone, but I’m hoping that Google+ remain a decent and use-able social media platform. So with everything said and done, will you say “Hello” or “Goodbye” to the new Google+ social network?

Credits:
Google and the Google logo are registered trademarks of Google Inc., used with permission | Google+ Logo Used Under Creative Commons CC Attribution-ShareAlike 3.0 Unported License | Firefox Logo Used Under Creative Commons CC Attribution ShareAlike 3.0 Unported License | Microsoft, Windows, and the Windows logo are trademarks, or registered trademarks of Microsoft Corporation in the United States and/or other countries | Other names may be trademarks of their respective owners.

Monday, April 25, 2016

Snipping Tool Grey Screen Solved

The Snipping Tool is a really useful screenshot capturing application that is available in the Windows operating system. I've used it very often to capture screenshots or portions of images.

You can also use this screenshot tool to annotate. So once you've taken a screenshot, you can save the final output in various file formats like PNG, JPEG, and GIF.

I've used the Snipping Tool both, in Windows 7 and Windows 10. The new Windows 10 version has a "delay" option.

Anyway, lest I digress, the main purpose of this blog post is to provide a solution to the grey or black screen, when using the Snipping Tool. I can't remember when and how, but at one point when using the Snipping Tool in Windows 7, I encountered a grey screen and it wouldn't allow me to take any screenshots. Basically, it disabled this tool for taking screenshot on my web browsers as well as on desktop applications.

One solution I found was to close open browsers and it would allow me to take screenshots, however, if I wanted to take screenshots within the browser I would continue getting the grey screen. Initially, I thought it was my firewall or Norton Security software that was causing this issue, but that wasn't the case.

Ultimately, after doing some troubleshooting, I narrowed it down to Trusteer Rapport, which is a security software that adds an additional layer of online security to your anti-virus / internet security software. I downloaded Trusteer Rapport via one of my financial institutions.

Anyway, after digging into Trusteer Rapport and making some changes to settings, I was able to get the Snipping Tool working again, both on broswers and my destop applications. You can check the video tutorial below for step-by-step instructions on How to Resolve the Snipping Tool Grey Screen Issue.


This solution may not work for everybody, but those who use Trusteer Rapport will most probably find it helpful. If you have any specific questions, please feel free to post them in the comments section below.

CREDITS:
- Trusteer Rapport® is a registered trademark of Trusteer, an IBM Company.

- Snipping Tool is a screen capture utility available in Windows Vista and later versions.
- IBM® and the IBM logo are registered trademarks of International Business Machines Corporation (IBM) in the United States, and/or other countries.
- Microsoft, Windows, and the Windows logo are trademarks, or registered trademarks of Microsoft Corporation in the United States and/or other countries.

Music by Riot | Song Title: Red Sea | Source: YouTube Audio Library (For Use on Monetized Videos)

Friday, March 4, 2016

Amazon Introduces Amazon Tap Voice-Controlled Bluetooth Speaker

Amazon Tap and Amazon Echo Dot now join the Amazon Echo family.

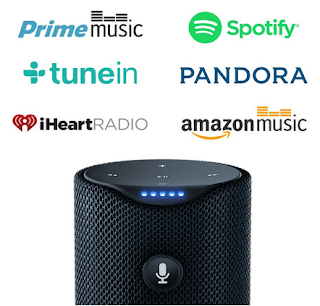
Amazon Tap is a new portable, wireless, voice-controlled, Bluetooth-enabled speaker with which you can listen to music from various online streaming services like Pandora, Spotify, iHeartRadio, TuneIn, and of course Amazon Prime Music.

You can also stream music directly from your phone. Amazon Tap is equipped with dual stereo speakers powered by Dolby providing 360 degree omni-directional sound.

Apart from being able to listen to music, it uses the Alexa Voice Service and can also provide you news updates, check the weather, order pizza, request Uber for a ride, and much more.

Amazon Tap is expected to give you up to 9 hours of battery life on a single charge. And when the battery is running low, you will be reminded in advance. Talking about charging, included with your purchase is a charging cradle, as well as a USB cable and adapter.

Optionally, you can purchase the Amazon Tap Sling which acts as a protective case as well as a sling to carry it along. The protective sling comes in six different colours: white, black, blue, green, pink, and orange. You can check the Amazon Tap in action in the video below:


Amazon Tap is currently only available in the United States, but I believe Amazon hopes to make it available internationally. Amazon Tap won’t be available just yet. It is expected to be released on March 31, 2016, at $129.99, but you can pre-order it at Amazon.

If you don’t yet have Amazon Prime Music, you can get it for a 30-day free trial. You can stream Prime Music on your phone, tablet, computer, Fire TV, as well as Amazon Echo.

On the other hand, the new Amazon Echo Dot is a smaller device only available to Amazon Prime members. It also uses Alexa Voice Service to provide you music listening pleasure over a range of online music streaming services.

Unlike, Amazon Tap, Echo Dot is equipped with far-field voice recognition technology and has seven microphones built into the device. Therefore, you can do a lot more with Echo like checking the news and weather, your schedule, setting your alarm, as well as controlling smart home devices like your thermostats, lights, and other connected devices. It’s priced at $89.99.

Monday, February 29, 2016

How to Use YouTube Custom Blurring Tool

YouTube introduced the Custom Blurring Tool in late February 2016. This is an extension of the blurring feature they had launched in 2012. This new feature provides the ability to blur people’s faces or blur sensitive information in your videos uploaded to YouTube.

I think it’s a great feature to have built-in, as part of the YouTube’s video Enhancements tools. This blur feature can be used once the video is uploaded to your channel.

The blur tool is a desktop version and works on static and moving objects. Of course, it’s a bit tricky and potentially time-consuming when working with moving subjects in your video.

When using the Custom Blurring tool, I noticed that it can be a little tricky when blurring moving objects, especially during the beginning of the video. The preview looks grainy and so it’s not always easy to tell if the final edited video will come out right. The video below is a test video I used to test out YouTube’s Custom Blurring Tool. As you can tell, at the beginning of the video, it didn’t completely cover one of the girl’s faces, but overall I think it’s did a pretty good job of blurring the faces in the entire video.


To use the Custom Blurring Tool, find the video in your Video Manager. Then click on the Edit button, and choose Enhancements. Next, in the Blurring Effects tab, you will find two blurring options: automatic, and custom. When you choose the Custom option, you will be able to draw a blur box around the area in the video that you want to blur.

This tool is designed to intuitively analyze what you’re trying to blur as the video plays. Depending on how movement there is, you will need to do some fine-tuning by adjusting the blur boxes as your scrub through the video. You will see the blur annotations in your video timeline. You can accordingly adjust the duration of the blur on the timeline itself. For static objects, you can use the Lock feature in the video timeline.

Once you’re done making the changes, you can save the video as a new video, or override the existing video and publish it on YouTube. In case you don’t want to publish the video life publicly, you can first upload the video as Unlisted and then make it public once you’re completed the changes and are happy with the result. It does take a little while for processing the changes.

For example, a short 19 second video (as shown above) took around 10 minutes to process. 10 minutes may not seem like a long time, but for a 19-second video, it is. But then again, it will depend on how many adjustments have been made. The Custom Blurring Tool is not perfect, but it’s very useful to have in your video editing arsenal.

You can check the video tutorial below on How to Use the YouTube Custom Blurring Tool:


Have you tried YouTube’s Custom Blurring Tool? Feel free to share your thoughts and comments below. If you have any questions, feel free to ask. Thanks for stopping by!

CREDITS:
- Canoeing video footage of taken by Anthony Godinho at Port Credit, Ontario, Canada
- Google and the Google logo are registered trademarks of Google Inc., used with permission.

- Microsoft, Windows, and the Windows logo are trademarks, or registered trademarks of Microsoft Corporation in the United States and/or other countries. Used with permission from Microsoft.

Monday, February 8, 2016

YouZign 2.0 Review 2016

YouZign is a powerful online graphics tool that I've been personally using for a few months now. This web-based graphics design software makes it easy to create various types of marketing graphics.

In today's world, sharing information via social media has become increasingly popular and shows no signs of stopping. But with so much digital content shared over social media, it's important to make your content stand out from the crowd.

With YouZign you can design high quality and professional-looking graphics for a variety of social media platforms like Facebook, Twitter, YouTube, Google+, Pinterest and others.

But that's not all you can do with YouZign. You can design web banners of different sizes, business cards, eBook covers, and infographics. You can even create effective ads for your business or clients, but there is still so much more.

I've used different types of graphics design software and tools in the market over the past few years and I like the simplistic user-interface that YouZign offers. More importantly, I like the commitment of the owner, Bertrand Do, who is constantly listening to users and making improvements to this online graphics design platform. Since its inception, we've seen YouZign evolve and improve tremendously.

You can check the short video below to take a quick look at what the platform looks like. In this YouZign Video Review, I highlight some of the key features you will find in this online graphics platform:


As you saw from the above YouZign Video Review, it's a pretty cool and useful tool to have in your social media creation arsenal.

Another aspect of YouZign that I particularly like is the flexibility to customize pretty much every element on the canvas. You will find contextual menus as you click various elements on the canvas to customize the look and feel of the graphic or image that you're creating.

If you are creative in nature, you can use the "New Template" to create your designs from scratch and build your masterpieces. You can use the hundreds of graphic design elements like graphics, icons, shapes, etc to build your design.

On the other hand, if you need to create a quick graphic design, you can use the hundreds of pre-made templates and customize them the way you want to.

With the integration of websites like Pixabay, Icon Finder, and Stocks Unlimited, you will have access to literally thousands of copyright-free images, graphics and icons directly from YouZign. You essentially choose which site you would like to look for images, and then use the Search Box to find them. Once you've found your image, you can immediately place it onto the canvas and start customizing it based on your needs.

I particularly like the built-in Photo Background Removal tool you will find in YouZign. With this feature, you can remove the background from any image and save it as an image by itself or apply another background. You can check this video tutorial below on how to remove a photo background using this tool:


Once you've successfully completed designing your graphic or image, you can save it into your Designs section within YouZign, or download a copy to your computer.

The one year anniversary of Youzign is on February 8, 2016. On this special occasion, the founder Bertrand is making YouZign available at a discounted price along with several improvements and enhancements to the platform.

This special offer is for a limited time, so if you like what you see, I suggest you pick up a copy as soon as possible. At some point, after this relaunch, the price will be on a monthly basis.

Hope you found this YouZign Review useful. If you have any questions, feel free to ask and I will do my best to respond to you.


AFFILIATE DISCLAIMER: If you use the links above to purchase the product. I may earn a commission as a JVZoo affiliate. This recommendation and review is based on my firsthand experience using this product myself.