The Explaindio Video Bundle 2020 is an incredible bundle of video apps that you can get at a deeply discounted price, for a limited time, during this Cyber Week.
This video bundle includes six main video apps, plus the Explaindio Video Toolbox which is a collection of 8 additional useful video tools.
Personally, I use many of the apps in this video bundle and would highly recommend them because I’ve found them useful in my own video creation.
If you were to buy these individual apps, the total value would amount to approximately $550 for the commercial license. Additionally, a couple of the video apps have a yearly recurring fee which amounts to $98 per year.
However, during this special Cyber Week promotion, you can get Explaindio Video Bundle 2020 for a special one-time price of only $27. Yeah, that's right. In fact, like I mentioned, a couple of the video apps in this bundle have a yearly recurring fee, but you get it for a one-time price.
This video bundle deal is indeed a phenomenal price for a total of 14 useful video apps, which you can get with the commercial license. It means that you can not only create videos for yourself and your business, but also create videos for your clients. You can check the details in this short video below, as well as further down this page.
If you use just one of the apps and make a single video, you will more than make up for this low one-time price. So what are the apps included in this bundle, you ask? Below, you will find a summary of the individual video apps included in this Explaindio Video Bundle 2020:
Storyxy: Create 3D animated videos $96 + yearly
Stop Motion Creator: Make stop motion videos $57
Explaindio Video FX: Add useful video $47
VidVamp: Revamp your old videos $69
ClipToGIF: Convert videos to animated GIFs $164
Motioney: Animate static images $57 + yearly
Explaindio Video Toolbox: 8 Audio-Video tools $59
So what you get with the front-end is the commercial version of the above apps for $27 one-time price. In the sales funnel, you will also find some upsells for relevant video products. These are also great prices if you want to take things to another level.
In Upsell 1, you can get the enhanced Pro version of the apps. In Upsell 2, you can get additional apps at a low price. In Upsell 3, you get the Agency version, which provides 5 more licenses or sub-users for each app purchased. And there are 3 other upsells of relevant video products. You do not need to purchase any of the upsells and can skip them all to complete the purchase.
This Cyber Week Special runs for a limited time starting December 3, 2019 at 11:00 am EST and ends on December 8, 2019 at 11:59 pm EST. As mentioned earlier, this special offer has an incredible value that you will not find anywhere else.
I personally use many of these apps, so I would highly recommend them based on my experience using these apps. Should you require any further information, feel free to ask. Thanks for stopping by!
AFFILIATE DISCLAIMER: If you use the link above to purchase the video apps bundle. I may earn a commission as a PayDotCom affiliate. This recommendation and review is based on my firsthand experience using many of the apps in the bundle myself.
CREDITS: Explaindio LLC product logos and screenshots are copyright protected, used with permission | Microsoft, Windows, and the Windows logo are trademarks, or registered trademarks of Microsoft Corporation in the United States and/or other countries | Commercial Rights to use videos, images and animations used in this video production | Other names may be trademarks of their respective owners.
If you're a YouTube creator, YouTuber or whatever we call ourselves - you know those of us, who have an active YouTube channel and create video content regularly.
Well, you must have come across the important notice posted by YouTube on COPPA compliance. There were a couple of messages, one of them was:
"Important: All creators are obligated to take action to comply with the Children’s Online Privacy Protection Act and/or other laws. Review your channel and video settings."
Many YouTube creators are very concerned about what these new changes mean to them in terms of their current content as well as going forward. More importantly what it means to their revenue generated through their video content. Well, before we dive into the details, let me briefly talk about COPPA and why YouTube needs to be in compliance with COPPA.
What is COPPA?
COPPA or Children's Online Privacy Protection Act, which is managed by the FTC (Federal Trade Commission) is a law designed to protect the privacy of children under 13. This privacy Act was passed by the US Congress in 1998 and took effect in 2000. I won't get into all the details about COPPA, but you can read about it to learn more about the Act.
Why YouTube Needs to be in Compliance with COPPA?
Well, in simple terms - YouTube has been naughty and the FTC slapped them with a record fine of $170 million for alleged violations of COPPA. As per this FTC Press Release on September 4, 2019, the violation was related to YouTube "illegally collected personal information from children without their parents’ consent."
The settlement not only requires Google and YouTube to pay the massive fine of $170 million, but also requires that Google and YouTube make necessary changes to their business practices and systems in terms of data collection and privacy.
Some of these changes include mandatory labeling of content intended for younger audiences, and stopping the collection of data on videos intended for children. In this official blog post, YouTube outlined these new data practices for children's content on YouTube.
YouTube has always held their stance that their platform was intended for people over 13 years of age. However, as per the press release “YouTube touted its popularity with children to prospective corporate clients,” said FTC Chairman Joe Simons. “Yet when it came to complying with COPPA, the company refused to acknowledge that portions of its platform were clearly directed to kids. There’s no excuse for YouTube’s violations of the law.”
And so here we are, as YouTube creators having to deal with the consequences of Google's and YouTube's negligence and lack of responsibility. Further down in this blog post, I will discuss some of the key changes and how it affects YouTubers as well as what we can do as content creators on YouTube to fight this or at least make our voices heard.
What do these Changes Mean for YouTube Creators?
First of all, these changes take effect in January 2020. However, YouTube has already started the process of informing and alerting YouTube creators about the changes that need to be made to their channel and videos.
As per the settlement, YouTube agreed to create and implement a system that requires YouTube creators to clearly identify the content that is meant for children. This is required because targeted or personalized ads cannot be placed on these videos.
YouTube has already implemented these changes in YouTube Studio. Essentially, YouTubers have two options to identify their videos as "Made for Kids" or "Not Made for Kids". The first option is at the global (or channel level); and the second option is at the video level. In the video below, Lauren, the Head of Family Partnerships at YouTube, discusses the new changes as well as provides instructions on how to use the channel and videos settings to identify your videos.
Another change that will be implemented by YouTube is a machine learning system that will automatically identify videos that are clearly deemed for children. However, they will initially rely of YouTube creators to mark their videos as "Made for Kids" or not. In the video below Lauren also highlights factors to take into consideration to help identify videos that are "Made for Kids".
In this video above, Lauren also highlights some of the other changes that will affect your videos that are marked as "Made for Kids". For example, YouTube will limit the data they collect from these videos in order to comply with COPPA.
Some other features that will no longer be available, on "Made for Kids" videos are the comments section, info cards, and end screens. Also, these videos will no longer have personalized ads, which could mean a decreased ad revenue.
What can YouTube Creators do to Fight Back?
My take on this is that this is not our fault as YouTube content creators, but looks like we are having to bear the brunt of it. And I think it's important to have our voices heard because it will impact the way we create our content and negative impact this can have on the revenue generated through our video content.
I completely understand and support the importance of privacy and especially protecting children. However, I believe that the responsibility that COPPA has put on YouTube content creators is unreasonable and unacceptable in my humble opinion.
My content and channel is not targeted towards kids, but still some of my videos may have to be labeled as "Made for Kids" because they may be deemed for a younger audience. It should be the responsibility of parents to restrict the websites they access including YouTube.
So what can we as YouTube content creators do to have our voices heard? Well, first watch this video below from J House Law who used to be a civil litigator. This video will help you get a good understanding from a YouTube creator's perspective and what we can do to make our voices heard.
As per the video above, here are some of the recommendations made, along with suggested talking points for creator and viewers. You will also find a link below to see comments already submitted by other YouTube creators and viewers:
This is a very serious matter and will affect some YouTube creators more than others. But, in general, this seems to be an overreach by the government trying to take more control of our lives. On this ending note, I'm reminded of this quote from Ronald Reagan "The most terrifying words in the English language are: I'm from the government and I'm here to help."
I encourage you to take it upon yourself to act and make your voices heard by doing the above and sharing this with others to do the same. Together we can make a difference. Thanks for stopping by!
CREDITS: Google and the Google logo are registered
trademarks of Google Inc., used with permission | Microsoft, Windows, and the
Windows logo are trademarks, or registered trademarks of Microsoft Corporation
in the United States and/or other countries | Logos and screenshots used with
permission from respective owners | Other company names may be trademarks of
their respective owners.
In an earlier blog post, I showed you How to Embed Facebook Posts. In this tutorial, you will learn How to Embed Tweets in Blogger. This applies to any other website where you can use the built-in HTML editor to embed your Twitter posts.
Embedding tweets in blog posts is common and is a great way to share yur tweets as well as other popular tweets. Below, you will see two examples of embedded tweets.
The first example is an image tweet in which I tweeted an quote image. These embedded tweets retain link functionality, which means that visitors can like the tweet directly from your blog post (for example).
In the second example, I embedded my Twitter timeline which lists down several of my latest tweets. This is great because you can also use this to display it in a sidebar of your website, if you choose to.
If you prefer watching a video tutorial, feel free to watch this video below in which I walk you through the process of embedding a tweet, step-by-step.
So here are the steps on How to Embed a Tweet:
Step 1: click down-arrow (top-right corner of tweet)
Step 2: choose the Embed Tweet option
Step 3: copy embed code (using Copy button)
Step 4: paste code in HTML editor (of website)
Bear in mind that you also have some basic options to customize the embedded tweet (optional). In order to do so, you can click the "Set Customization Options" link. As I showed in the video tutorial above, you will see options for a light and dark background. As well as, changing the color of the links in the tweet.
Below is an example of the embedded tweet that I showed in the video tutorial above. It is an image quote that I has tweeted. As you can see, the tweet is interactive, in the sense that, you can LIKE the tweet directly from the embed.
Here is another example of an embedded tweet in which I embedded my twitter timeline. The process of embedding the twitter timeline is similar. You just use your Twitter handle and choose the Timeline option. It will then generate the embed code which you can copy and paste (just like I did here).
Well, hope this brief tutorial helped on how to embed tweets on your website. If you have any questions, please leave them in the comments section. Thanks for stopping by!
CREDITS: Twitter logo and screenshots are copyright protected and used with permission | Google and the Google logo are registered trademarks of Google Inc., used with permission | Commercial rights to use videos, graphics & images used in this video | Microsoft, Windows, and the Windows logo are trademarks, or registered trademarks of Microsoft Corporation in the United States and/or other countries | Logos and screenshots used with permission from Microsoft | Other company names may be trademarks of their respective owners.
Sharing posts on social media is something many of us do on a regular basis. We share different types of posts like text, images, GIFs, and videos.
In this blog post, I'll show you how to embed three types of Facebook posts in Blogger. You can use these same instructions to embed FB posts on any website, including WordPress websites.
In the first example, I will show you how to embed a regular Facebook post in which I have shared a YouTube video with some text in the post.
In the second example, I'll show you how to embed a Facebook picture post in which I have uploaded a quote image to Facebook with the quote in text format. And in third example, I'll show you how to embed a video which I uploaded to Facebook.
How to Embed a Facebook Post?
First let's start with how to embed a regular Facebook post on your website. Follow these steps shown below: (1) Go to the Facebook post; (2) Click on the ellipsis icon; (3) Choose "See More Options"; (4) Next, choose Embed; (5) copy the iFrame code; (6) paste the code on your website.
You can also check the video tutorial below, for step-by-step instructions:
And here is an example of an embedded regular Facebook post.
How to Embed a Facebook Picture?
Next, let me show you how to embed a Facebook picture on your website. The process is similar to embedding a regular Facebook post, but a few steps are different, as shown below: (1) go to the Photos section; (2) click on the specific video; (3) hover your mouse over the picture; (4) click on Options (bottom-right); (5) choose Embed; (6) copy the iFrame code; (7) paste the code on your website.
You can also check the video tutorial above, for step-by-step instructions.
And here is an example of an embedded Facebook picture.
How to Embed a Facebook Video?
Next, let me show you how to embed a Facebook video on your website. The process is similar to embedding a regular Facebook picture, but a few steps are different, as shown below: (1) go to the Videos section; (2) click on the specific video; (3) click the ellipsis button (bottom-right); (4) choose Embed; (5) copy the iFrame code; (6) paste the code on your website.
You can also check the video tutorial above, for step-by-step instructions.
And here is an example of an embedded Facebook video.
A couple of things to note; (1) you can only embed Facebook posts that are shared publicly; (2) when getting the embed code, you can also click on the "Advanced Settings" link in the dialog box which provides you some flexibility to customize the embedded Facebook post.
Well, hope this brief tutorial helped on how to embed various types of Facebook post on your website. If you have any questions, please leave them in the comments section. Thanks for stopping by!
CREDITS: Facebook logo and screenshots are copyright protected and used with permission | Google and the Google logo are registered trademarks of Google Inc., used with permission | Commercial rights to use videos, graphics & images used in this video | Microsoft, Windows, and the Windows logo are trademarks, or registered trademarks of Microsoft Corporation in the United States and/or other countries | Logos and screenshots used with permission from Microsoft | Other company names may be trademarks of their respective owners.
The YouTube Channel Trailer is one of the very useful branding features that is available to YouTube creators.
If you want to build and grow a professional YouTube channel, then you should definitely look at using the branding features that YouTube offers like channel art and of course the video trailer.
In this blog post, I will cover the basics of the YouTube channel trailer as well as some tips and guidelines on how to create a good video trailer for your channel.
Also, I will show you step-by-step how I created my 2019 YouTube channel trailer in Viddyoze which is a video animation software.
What is a YouTube Channel Trailer?
Well, first let me briefly explain to you what a YouTube channel trailer is. YouTube has provided many branding features to creators like the option to upload channel art, profile picture, including a video trailer.
Basically, it's a video that you can display on your main channel page. This channel trailer is shown to all unsubscribed visitors who land on your channel.
The video trailer should be focused, short and provide the visitor a quick snapshot of the type of content they can expect on your channel. Generally, the channel trailer should be between 30 to 60 seconds in duration.You can do a voice-over if you want to, but I created mine as a video montage.
How to Upload Channel Trailer to YouTube?
In the above video, I walk you through each of the steps involved in uploading your video trailer to your YouTube channel. Also, below I briefly list down the steps involved. To upload a YouTube channel trailer, follow these steps shown below:
Upload video like a regular YouTube video;
Go to the channel you want to upload the trailer;
Click on the Customize button;
Go to the Home tab;
Click on the tab that reads “For New Visitors”;
Click on the pencil (edit) button;
Choose the “Change Trailer” option;
Choose video you want as your channel trailer.
Once you've uploaded your channel video trailer, it will display for all your non-subscribers who visit your main channel page. This is a great way to capture their attention.
How to Create a YouTube Channel Trailer?
This blog post was mainly focused on how to upload your channel trailer. However, if you're also interested in learning how to create professional-looking YouTube channel trailers, you can watch this tutorial below. In this video tutorial, I walk you through the process, step-by-step, on how I created my 2019 YouTube channel trailer using the Viddyoze animation software.
There is so much more you can do with Viddyoze. For example, if you want to create high-quality logo stings (i.e. animated logos) by using your company logo, you can do that too. Additionally, you can incorporate various other video elements when creating your videos.
For example, you can create intros, outros, lower-thirds, cool text animations, call-to-actions and so much more. You can check my Viddyoze Review video below to learn more about the key features and how you can benefit from this video animation software.
If you don't already have Viddyoze, you can get it at a special price. The current price that Viddyoze is being sold at is $127 (one-time). However, if you click the banner below, you can get it at a special one-time price of $97. I'm not sure how long this promotion will be available, so grab it while you can.
AFFILIATE DISCLAIMER: If you use the links above to purchase Viddyoze, I may earn a commission as an affiliate marketer. This recommendation and review is based on my firsthand experience using the mentioned products myself.
CREDITS: Google and the Google logo are registered trademarks of Google Inc., used with permission | Microsoft, Windows, and the Windows logo are trademarks, or registered trademarks of Microsoft Corporation in the United States and/or other countries | Logos and screenshots used with permission from respective owners | Other company names may be trademarks of their respective owners.
In this FlexClip Review I will cover some of the key features and functionality of this free cloud-based video creation app. The popularity of video has increased a great deal over the past few years.
Using video in communication today is an effective tool. Whether it is for commercial purposes, like advertising, or sharing personal experiences through videos.
That being said, creating videos can be daunting, especially if you're new to video creation. I personally use many different video creation software for different types of videos. FlexClip is a decent addition to my video arsenal and toolbox.
You can create videos fast by using many of the professionally-designed premade video templates. But, if want a little more flexibility you can also create videos from scratch by using the blank template. I show you how to create videos, step-by-step.
In this video below, I do a brief FlexClip Review based on my own firsthand experience using this new video maker. Overall, I like FlexClip as a video creator and I think if you’re a novice at video creation, you will find this online video app useful. Further down the page, you will find my demo and walk-through video, in which I give you a tour of the user-interface.
FLEXCLIP OVERVIEW & WALK-THROUGH
In this video above, I give you a demo of FlexClip and walk you through the user-interface. What I like most about this cloud-based video maker is that it is easy to use and is especially great for beginners. The FlexClip user-interface is simplistic which makes it easy to create videos with not much of a learning curve.
The basic steps involved in creating a video in FlexClip are fairly simple: (1) you upload your media (images or video clips); (2) add animated text and customize it; (3) and finally preview the video and export the video as an MP4. You can add music and even record your own voice-over for each scene (if you want to). FlexClip has a built-in library of royalty-free stock images and video footage, as well as background music. With FlexClip you can create square and vertical videos which are great for social media.
HOW TO CREATE VIDEOS IN FLEXCLIP
As mentioned earlier, you can create different types of videos in FlexClip. You can use the many professionally-designed video templates or create your own videos from scratch using the blank template. They plan to continue adding more video templates.
In this video below, I walk you through the process of creating a video from scratch, step-by-step. I focus on creating a short demo video using the blank template. The basic process of creating videos from scratch in FlexClip is fairly simple: (1) you create a blank project; (2) add scenes; (3) add images and video clips to your scenes; (3) add animated text to your scenes; (4) add background music or record a voice-over for each scene; (5) preview the video; (6) and finally export the video as an MP4.
The rendering of the video projects is fairly quick. In my experience, it took less than a minute to render a 30 second video. The rendering speed will of course depend on how long your video project is and what type of media you’ve used in your video project.
FLEXCLIP PLANS COMPARISON
As mentioned earlier, FlexClip is free to use, but there are currently two premium plans: Basic and Plus. The free version has limitation in terms of features and functionality. In this video below, I compare some of the key features in the free vs premium plans.
First of all, in the free plan, you’re limited to creating up to one-minute videos in duration. Comparatively, you can create up to 3-minute duration videos in the BASIC plan, and up to 5-minute duration videos in the PLUS plan.
Secondly, you’re limited to a maximum of 12 saved projects as opposed to, 50 and 200 saved projects respectively, in the premium plans. You can of course, delete projects.
Thirdly, you're limited up to 480p (standard) resolution downloads in the free version. Whereas, the Basic (720p) and Plus (1080p) plans have HD quality resolution downloads.
Fourthly, you’re limited to using one stock video per project, in the free version, compared to 5 stock videos (in the BASIC plan) and unlimited stock videos (in the PLUS plan).
Finally, you will have a FlexClip watermark in your rendered videos, in the free version and no FlexClip watermarks, in the premium plans.
In terms of the pricing, the Basic plan costs $60 (paid annually) and the Plus plan costs $96 (paid annually). These prices are subject to change, so make sure to check the FlexClip website.
In terms of IMPROVEMENTS, currently FlexClip only works on Google Chrome, but they plan to make it compatible with other browsers like Firefox. I would like to see an option to create folders in the My Projects section in order to better organize video projects. I would also like to see an option to fade out background music.
Overall, I like FlexClip as a video creator and I think you will find this cloud-based video creation app useful and fun to use, especially if you’re new to video creation. If you have any questions, please feel free to ask. Also, if you're already using FlexClip, feel free to leave your feedback and suggestions for improvements in the comments section below and I will be sure to pass it on to the FlexClip team.
CREDITS: FlexClip logo and screenshots are copyright protected used with permission | Any images, graphics, video clips used in this video belong to Anthony Godinho or are licensed for commercial purposes and used with permission | Microsoft, Windows, and the Windows logo are trademarks, or registered trademarks of Microsoft Corporation in the United States and/or other countries | Other names may be trademarks of their respective owners | Video Produced by Anthony Godinho, HR Professional, Internet Marketer, YouTube Partner & Blogger
Pablo is a free web-based app developed by a company called Buffer. Sharing and posting inspirational and motivational quotes is popular on social media. It's a great way to share positivity and encouragement. I personally love sharing quotes that inspire and motivate.
If you use social media, it's a good idea to share quote images from time to time. In fact, on Twitter, you will often notice trending topics like #MondayMotivation #TuesdayMotivation #WednesdayWisdom and the like.
With Pablo you can create free quote images by using royalty-free and copyright-free images that are built into the app itself. This is done via the API integration with two popular public domain image sites Unplash and Pixabay.
You have access to literally thousands of high quality images that you can use in your quote images to make them look really professional. In fact, you can even add your company logo to brand the quote images. There is an option to upload your logo and place it anywhere on the quote image.
With the Pablo app, you can create quote images for Pinterest, Instagram, Twitter and Facebook. Apart from being able to create free quote images, you can also create other types of social media images and banners for promotional purposes.
I've created many different quotes images using this useful free cloud-based app. In fact, I've created a step-by-step tutorial on How to Create Quote Images in Pablo you can check the video below:
Based on my own experience using Pablo, I found it easy-to-use and I like the overall simplistic user-interface. You can create quote images within a few minutes and share them directly to your social media accounts or use the download option to download the quote image to your computer.
Apart from creating your own custom quotes images, you can use the automatic quote generator. Just with a click of a button you can generate random quotes and if you like a particular quote, you can decide to use it and create your quote image.
With the built-in API integration that gives you access to thousands of beautiful copyright-free images, you can use the same quote with different images. You can also apply filters to your images to create a contrast between the background image and the text in the foreground.
Below are some examples of branded quote images that I've created in Pablo. You will notice that I added my own logo on the quote images. As I mentioned earlier, the Pablo app is free to use and you don't even
need to register or sign-in and nothing to download because it's a
web-based app. I personally use Pablo and would definitely recommend it. I'm pretty sure you'll love it!
CREDITS: Pablo logo & screenshots are copyright protected and used with permission. Pablo is a start-up and product of Buffer | Images used on the Pablo App are from https://unsplash.com/ and https://pixabay.com/ | Microsoft, Windows, and the Windows logo are trademarks, or registered trademarks of Microsoft Corporation in the United States and/or other countries | Other names may be trademarks of their respective owners | Video Produced by Anthony Godinho, HR Professional, Internet Marketer, YouTube Partner & Blogger.
Amazon Prime Day is almost here and it has become one of the major online shopping events of the year. Amazon launched Prime Day in July 2015 to commemorate the company's 20th anniversary.
Prime Day is a two-day super online deals event and Amazon promises over a million deals in 2019. These deals range from grocery items to Amazon Fire TV Sticks to 4K televisions.
In 2019, Prime Day starts on Monday, July 15th at 12:00 am Pacific and ends on Tuesday, July 16th at 11:59 pm Pacific.
Amazon Prime Day deals are exclusive to Prime members. So in order to avail of these Prime Day exclusive deals, you need to have Amazon Prime membership. Now, if you do not have the membership, no worries, you can get a Free One-Month Trial of Prime membership and make the best of it during this exclusive event.
Amazon Prime is an annual membership that was first launched by Amazon back in 2005. Prime memberships has many benefits including free shipping, access to Prime Video, Prime Music, and so much more. I've actually created a video showcasing some of the key Prime Benefits and a comparison of the membership between US and Canada.
If you're a student, you can get a Free 6-Month Trial of the Prime Student membership. This is great because you can not only avail of the huge Prime Day deals, but also use the membership benefits for free, for a whole 6-month period. I've created a video to showcase Amazon Prime Student benefits.
So how do you prepare for Prime Day 2019? Here are the basics:
Some of the early Prime Day deals include the following. Also, look out for Special Prime Day Launches which are exclusive new launches for Prime members for a limited time:
Take a Prime Day Sneak Peek using the Amazon App. Search "sneak peek" within the app and then get a sneak peek into all the deals available. Make sure to turn on the Amazon App notifications.
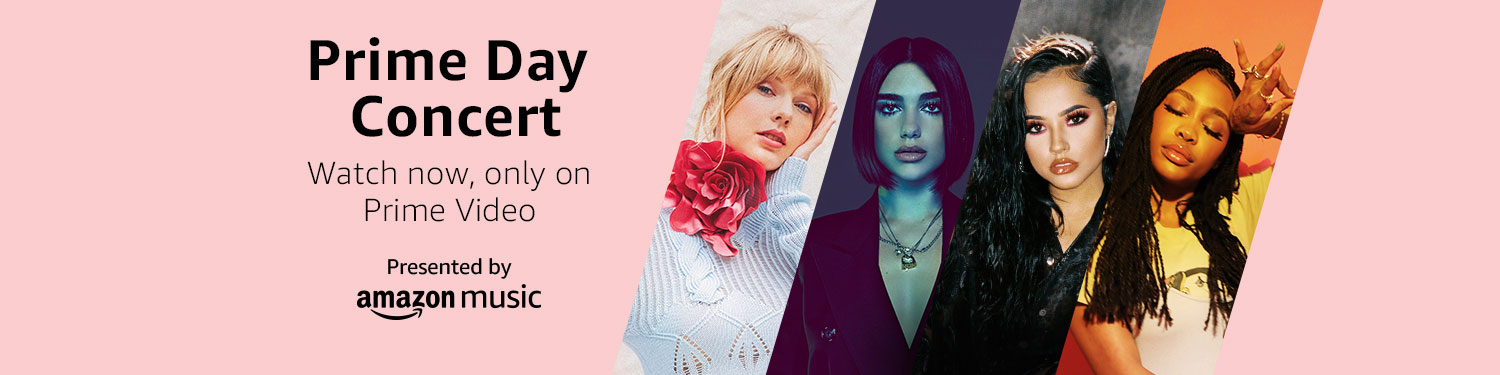
This year, in anticipation of Prime Day 2019, Amazon aired a live music event called Prime Day Concert 2019. This music event which was held on July 10, 2019, was exclusive to Prime members. It featured top music artists like Taylor Swift, Dua Lipa, SZA and Becky G. As a Prime member, you can watch the highlights of this music event, for a limited time, which was held at the Hammerstein Ballroom in New York City.
AFFILIATE DISCLAIMER: If you purchase using any of the affiliate links above, I may earn a commission as an Amazon affiliate. CREDITS: Amazon Prime and other images, banners, graphics used in this video are used as an Amazon Associate, unless otherwise mentioned | Amazon and the Amazon logo are registered trademarks of Amazon.com, Inc., or its affiliates, in the United States and other countries | Microsoft, Windows, and the Windows logo are trademarks, or registered trademarks of Microsoft Corporation in the United States and/or other countries. Logos and screenshots used with permission from Microsoft | Other company names may be trademarks of their respective owners.
I've used many different video editors over the years since I got into video creation and video marketing. For the past couple of years, I've stuck with Movavi Video Editor as my main video editing software.
One of the main reasons I like Movavi is because it's simple to use, but at the same time it has some really useful video editing features. I'm using one of the older versions of Movavi and it works great for the types of videos that I create.
In this particular blog post, I'm going to share How to Stretch a 4:3 aspect ratio video to a 16:9 aspect ratio video. Bear in mind that this particular feature is not available in the newer versions of Movavi. So if you're using the latest version, you may not have this feature.
That being said, all hope is not lost. You can still manually stretch your 4:3 aspect ratio video to a 16:9 aspect ratio video. And further down this blog post, you will find a video tutorial where I show you how to manually stretch your MP4 video using Movavi.
So first let me start by showing you how to stretch a 4:3 aspect ratio video to a 16:9 aspect ratio video using the built-in Project Settings feature in the older version of Movavi.
One way to covert a 4:3 video to a 16:9 video is to use the Crop Tool in Movavi. However, using this method, you will lose some of the content in the video. If you’d like keep all the content and just stretch the video, you will need to use the Stretch option under Project Settings. In order to do so, follow these steps:
Add the video to Movavi using the Add Media button;
Click the Edit button, in the Project Settings section (below the timeline);
Set the resolution of the video (I used 1280x720p in this example);
Under Framing, choose Stretch and click OK;
and finally, render the video using the Export button.
If you prefer video instructions, watch this video tutorial on How to Stretch a Video in Movavi video editor in which I walk you through the process step-by-step:
Like I said earlier, if you're using the latest version of Movavi video editor, then most probably you won't have the Project Settings option. In this case, you will have to manually stretch your video. You can check this tutorial below to do so. Bear in mind that this tutorial below is just a rough tutorial I created for one of my YouTube viewers who requested it:
I don't know why the Movavi team removed this Project Settings feature in the new versions. I find it very useful and so I've contacted them and asked them to add it back. I would appreciate if you could also contact Movavi and ask them to add this feature back in their latest version. The more users contact them, the more likely they are to add this feature back.
Well, hope you found this tutorial useful. You will find many more Movavi video tutorials as well as my Movavi Review on my YouTube channel. If you have a request for a specific tutorial, please let me know and I will do my best to create it.
Also, if you don't yet have Movavi Video Editor, you can get up to 30% discount. Check the links below to avail of these special prices. The 30% offer is for a limited time:
If you have any questions or comments, please feel free to leave them in the comments section below. Thanks for stopping by and happy video editing! AFFILIATE DISCLAIMER: If you use the links above to purchase any of the Movavi products. I may earn a commission as an affiliate marketer from reputable companies like Avangate, Amazon, JVZoo and the like. This recommendation and review is based on my firsthand experience using the mentioned products myself.
CREDITS: Movavi logo and screenshots are copyright protected used with permission | Any images, graphics, video clips used in this video belong to Anthony Godinho or are licensed for commercial purposes and used with permission | Microsoft, Windows, and the Windows logo are trademarks, or registered trademarks of Microsoft Corporation in the United States and/or other countries | Video Created Using BSR Screen Recorder 6.0 (commercial use rights) | Other names may be trademarks of their respective owners | Video Produced by Anthony Godinho, Internet Marketer, YouTube Partner & Blogger
The YouTube Annotations tool was a really useful feature that allowed YouTubers to add different types of interactive annotations in their videos. I personally used this tool extensively because I found it very useful.
One useful benefit was being able to create clickable links in YouTube videos. In March 2017, YouTube announced that they would be phasing out the annotations feature citing decreased usage.
They recommended using the new Cards and End Screens features instead, which are more mobile-friendly. I miss having the annotations tool, but do appreciate the Cards and End Screens features.
In this blog post, I'm going to focus on How to Create Clickable Links to your Website in YouTube videos. Over the years, the eligibility requirements for this feature has also changed. So first I'm going to share the overall steps involved in this process.
OVERALL PROCESS INVOLVED
STEP 1: You need to be part of the YouTube Partner Program (YPP)
In order to be eligible to join the YouTube Partner Program, you need to have 4,000 public watch hours in the last 12 months, as well as, have more than 1,000 subscribers. You can click the link above to learn more.
STEP 2: Associate your website with your Google Account.
In this step, you need to associate your website to your Google account by adding it to Google's Search Console (formerly known as Webmaster Tools). You can check the video tutorial below for step-by-step instructions.
STEP 3: Add a Card or End Screen to your video to create a clickable link to your website.
In order to add a clickable link to your website in your YouTube video, you also need to add a video or video playlist element. Again, you can check the video tutorial below for detailed instructions.
HOW TO ASSOCIATE WEBSITE TO GOOGLE ACCOUNT
So once you've applied for the YouTube Partner Program and your application has been approved, you will be able to associate your website to your Google account and YouTube channel.
In order to do this, you will need to add your website to Google Search Console which was formerly known as Google Webmaster Tools. You start by adding a new Property and then add the necessary website details. You will then have several options to add a piece of code (called the Meta Tag) to your website.
Once you do the above, you need to go back to Google Search Console and verify your ownership of the website. Finally, you need to go to your YouTube account under Advanced Settings and add your website URL and save the changes. You can check this step-by-step tutorial below as I walk your through each step:
HOW TO CREATE CLICKABLE LINK IN YOUTUBE VIDEO
Once you've successfully associated your website to your Google account, you are now ready to add a clickable link in your YouTube videos. In order to do so, you go into video Edit mode via the Video Manager section. Next, you click on either Cards or End Screens tab.
Click on the Add Element button, and under the Link section, click on Create. You will see a dialog box pop-up, enter your website URL and click Next. Enter a Title, choose a Call To Action, upload a thumbnail. And finally, click the Create Element button.
Bear in mind that you are required to also add a video or video playlist element when adding a website link. Also, note that you can only add an End Screen at the last 20-seconds of the video. In the video tutorial below, I walk you through the process step-by-step:
Well, hope you found this blog post useful. If you have any questions, please leave them in the comments sections and I will do my best to help you. Thanks for stopping by!
CREDITS: Google and the Google logo are registered trademarks of Google Inc., used with permission | WordPress logo and screenshots are copyright protected used under Creative Commons CC BY-SA 4.0. | Jetpack logo and screenshots are copyright protected and are trademarks of Automattic Inc. used with permission| Other names may be trademarks of their respective owners.